Why won’t my LXC containers auto start?

Wait… What just happened?

I recently encountered an interesting issue: I had a power failure and had to shut down my Fedora server. When power was restored, none of my LXC containers auto-started.

Needless to say, this confused me.

Investigating the problem

I double checked the config files for my LXC containers, and the ones that I expected to auto start all still had the following line:

lxc.start.auto = 1

So that wasn’t the problem. I checked that the LXC service had started and appeared to be functioning normally. All was well.

I checked logs and found no mention of my containers (error or otherwise).

I tried manually starting the LXC containers. No problem — they all started just fine.

Google to the rescue?

Next, I did some Google searching. I found lots of info on how to configure containers to auto-start, and a few threads on problems auto-starting containers that all seemed to be a result of network or other simple misconfigurations.

A couple threads mentioned that the actual auto start of LXC containers is performed by lxc-autostart, so I shut down all my containers and tried running that manually. No joy. Not a single container started.

Ah-hah!

I checked the man page for lxc-autostart and suddenly had a sudden realization when I found this in the initial description:

By default only containers without a lxc.group set will be affected.

I have recently been migrating most of my containers from Fedora to Ubuntu, and wanted an easy way to keep track of which containers were running what. In order to do that, I wrote a quick script that would scan all my containers and add them into LXC groups (e.g., “fedora-39”, “fedora-40”, “ubuntu-20-04”, “ubuntu-24-04”, etc.). These groups will show up when you run “lxc-ls -f”, making it very easy to tell what’s running what.

What I didn’t realize is that this would effectively make the lxc-autostart program completely ignore all my containers on a system reboot.

Running “lxc-autostart -a”, which processes all containers regardless of their LXC group, started my containers and confirmed the problem.

Solving the problem

So… how do I fix this? Further investigation determined that the lxc-autostart program is run during boot by the /usr/libexec/lxc/lxc-containers script, which includes the following:

# BOOTGROUPS - What groups should start on bootup?
#       Comma separated list of groups.
#       Leading comma, trailing comma or embedded double
#       comma indicates when the NULL group should be run.
# Example (default): boot the onboot group first then the NULL group
BOOTGROUPS="onboot,"

So this left me with two easy solutions. I could either add all my groups into this script, or I could add all my containers into the onboot group. Since I didn’t want to have to keep editing this script as new OS versions come out, I decided to add all my containers into the onboot group. LXC containers can be in multiple groups, so this was as easy as adding the following line to each of my containers:

lxc.group = onboot

Running “lxc-ls -f” isn’t quite as pretty, but this solved my problems.


Upgrade Time!

Upgrading a system is always a fun and somewhat fraught endeavor. I have a home server on which I run many different services for my home network and that I use for general experimentation, using LXC containers and KVM virtual machines.

The original incarnation of this server was built back in mid 2011, and over the years I have upgraded and added various components: I’ve added memory, more and bigger disks, switched to SSD’s for the OS drives and in turn upgraded those, added some hot swap drive bays, and more. However, the guts of the system — the motherboard and CPU — have remained unchanged, and thus have become quite long in the tooth.

I decided it was time for a comprehensive overhaul and upgrade of the system, and just completed that.

First: Spring Cleaning

This server is built in a Rosewill RSV-R4000 rackmount server chassis, which is still a very nice chassis. However, over the course of 11+ years, it has accumulated a fair bit of dust and grime. Thus, the first thing I did was to disassemble and thoroughly clean everything off.Server front panel filter

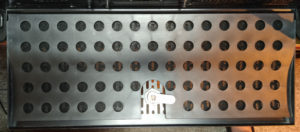
The front panel hinges down and has a dust filter (pictured at right). I pulled that dust filter out and thoroughly washed and dried it. It was pretty nasty and took a fair bit of sloshing around in a sink before the rinse water ran clear.

The entire inside of the case got a wipe down once the motherboard was removed. Next, I removed the drive cages and drives and cleaned them all. I used generic disinfectant wipes for the case and cages, and an alcohol solution to carefully wipe down the drives and any other electronics that I was keeping.

Server rear fansEach of the two drive cages have a 120mm fan, but the original fans were at this point very dirty and quite noisy. In addition, these fans were old always-on single-speed fans that plugged into a PATA drive power connector. I replaced the fans with clean and quiet new PWM speed-controlled fans. I used rubber fan mounts rather than screws to help eliminate vibration and noise. The chassis also uses two 80mm fans in the rear of the case, and these were also pretty loud and nasty after 11+ years. Again, these were always-on single-speed fans using PATA power, so I replaced them with new PWM fans using rubber fan mounts.

All of this left me with a server that is much cleaner and should run quieter and cooler than it has in a long time.

Second: Rip out and Replace the Guts

The main purpose of this exercise, though, was to replace the guts of the system. So I did just that. New motherboard. New CPU. New memory. New primary drives. New SATA controller. Replaced and upgraded one of the drives. Here’s a summary of the old vs. new:

ComponentOldNew
MotherboardGigabyte GA-870A-USB3
Socket AM3
PCIe 2.0
6 on-board SATA ports
X570 Phantom Gaming 4
Socket AM4
PCIe 3.0
8 on-board SATA ports
CPUAMD Phenom II X4 965
4 cores / 4 threads
2586 Passmark CPU Mark
AMD Ryzen 5 5600G
6 cores / 12 threads
19847 Passmark CPU Mark
Memory16 GiB
4 x 4 GiB DDR3 1600 Mhz
64 GiB
4 x 16 GiB DDR4 3200 Mhz
OS Drive2 x 512 GB SSD
480 MB/s max sustained read
2 x 1 TB NVME
2600 MB/s max sustained read
SATA controllers2 port PCIe 1.0 x1 card
4 port PCIe 2.0 x1 card
10 port PCIe 3.0 x2 card
Total raw storage63 TB75 TB

So… in a nutshell…

  • 7.5x CPU performance
  • 5.4x OS drive performance
  • 4x memory
  • 12TB additional raw storage

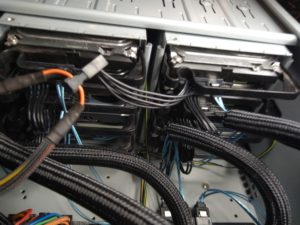
Server drive cablingWhile I was at it, I replaced all of the SATA cables with new thin locking cables, replaced the drive power cables with daisy-chained power cables, and added some cable sheathing so that the cable management is much cleaner rather than a total rat’s nest.

All in all, I’m pretty happy with the results. The server is now much more powerful and will let me do some experimental stuff that the old server just wasn’t fit to handle any more. For example, I can run modern Windows VMs on the new server and actually have them be responsive, which is nice.

Burn-in testing new hard drives

I just bought a new 14 TB Seagate Exos hard drive. I’m using it to replace a 4TB Seagate Desktop drive that I purchased during the Black Friday sales back in 2015, and which has been chugging along faithfully ever since. As of last check, it had recorded 61,747 hours powered on — that’s over 7 years actively spinning!

I’ve occasionally had problems with newly purchased drives, ranging from drives that were dead on arrival or failed quickly to drives that the vendor claimed were new but clearly were refurbished. As a result, I’ve learned to always run new drives through a series of checks and tests before I actually entrust data to them.

Here’s a rundown of what I do:

Check the Warranty

The very first thing to do is to check the drive’s serial number against the manufacturer’s warranty site and make sure that it reports that the drive is still in warranty and has a warranty expiration date that’s in the range you expect. It’s important to note that the warranty on most drives these days is based on the manufacture date and not the sale date, so this is particularly important if you’re buying stock that might have been sitting on a warehouse shelf for a while.

Here are a few quick links to sites where you can check warranty status for drives:

Check the drive with SMART

Virtually all modern storage devices, whether old-style spinning hard drives, newer SSD’s, or even newer NVME storage, support SMART, or Self-Monitoring, Analysis and Reporting Technology. This allows you to pull statistics from and run tests against the drive, and SMART data can often give warning that a drive is in the process of failing.

One of the best tools for accessing SMART information is the smartctl tool, which is part of the smartmontools package. This package may already be installed on your Linux system, but if it’s not, simply install smartmontools. It’s even available for Windows systems.

Next, run a series of smartctl commands against the drive in question. Note that smartctl needs to run as root (either directly or via sudo) to be able to access the drive properly. In the sections below, I show the results of running different smartctl commands to pull specific information on the drive, but you can also use “smartctl -a” to dump all the SMART information at once. For example, assuming that the new device is /dev/sdc, you might run this:

[user@server ~]$ sudo smartctl -a /dev/sdc

This will dump a full report of all the SMART information available for the drive.

Check the SMART Information

You can use “smartctl -i” to check the SMART Information Section. Here’s an example (note that I’ve obscured the serial number of my drive):

[user@server ~]$ sudo smartctl -i /dev/sdc
smartctl 7.3 2022-02-28 r5338 [x86_64-linux-6.0.15-300.fc37.x86_64] (local build)
Copyright (C) 2002-22, Bruce Allen, Christian Franke, www.smartmontools.org

=== START OF INFORMATION SECTION ===
Model Family:     Seagate Exos X16
Device Model:     ST14000NM001G-2KJ103
Serial Number:    XXXXXXXX
LU WWN Device Id: 5 000c50 0e48324fd
Firmware Version: SN03
User Capacity:    14,000,519,643,136 bytes [14.0 TB]
Sector Sizes:     512 bytes logical, 4096 bytes physical
Rotation Rate:    7200 rpm
Form Factor:      3.5 inches
Device is:        In smartctl database 7.3/5319
ATA Version is:   ACS-4 (minor revision not indicated)
SATA Version is:  SATA 3.3, 6.0 Gb/s (current: 6.0 Gb/s)
Local Time is:    Sun Jan 1 03:26:30 2023 GMT
SMART support is: Available - device has SMART capability.
SMART support is: Enabled

You’ll want to look at the model, size, and serial number of the drive and check that these match against what’s written on the drive and that they’re correct for what you purchased. I have encountered a few manufacturers where the internally reported serial number doesn’t match what’s written on the drive (TEAM Group SSDs come to mind), but most drives will accurately report the serial number, and a mismatch indicates shenanigans.

Check the SMART Health

Next, verify that SMART reports the drive is healthy, using the “smartctl -H” command:

[user@server ~]$ sudo smartctl -H /dev/sdc
smartctl 7.3 2022-02-28 r5338 [x86_64-linux-6.0.15-300.fc37.x86_64] (local build)
Copyright (C) 2002-22, Bruce Allen, Christian Franke, www.smartmontools.org

=== START OF READ SMART DATA SECTION ===
SMART overall-health self-assessment test result: PASSED

If the SMART overall-health self-assessment reports anything other than PASSED, something’s wrong with the drive and you should consider returning the drive for a replacement.

Check the SMART Attributes

I also check the attributes of the storage device as reported by SMART, as these can identify potential shenanigans with refurbished drives being re-sold as new. This is done via “smartctl -A” (note that that’s a capital A):

[user@server ~]$ sudo smartctl -A /dev/sdc
smartctl 7.3 2022-02-28 r5338 [x86_64-linux-6.0.15-300.fc37.x86_64] (local build)
Copyright (C) 2002-22, Bruce Allen, Christian Franke, www.smartmontools.org

=== START OF READ SMART DATA SECTION ===
SMART Attributes Data Structure revision number: 10
Vendor Specific SMART Attributes with Thresholds:
ID# ATTRIBUTE_NAME          FLAG     VALUE WORST THRESH TYPE      UPDATED  WHEN_FAILED RAW_VALUE
  1 Raw_Read_Error_Rate     0x000f   081   065   044    Pre-fail  Always       -       112398000
  3 Spin_Up_Time            0x0003   096   096   000    Pre-fail  Always       -       0
  4 Start_Stop_Count        0x0032   100   100   020    Old_age   Always       -       4
  5 Reallocated_Sector_Ct   0x0033   100   100   010    Pre-fail  Always       -       0
  7 Seek_Error_Rate         0x000f   074   060   045    Pre-fail  Always       -       24504019
  9 Power_On_Hours          0x0032   100   100   000    Old_age   Always       -       72
 10 Spin_Retry_Count        0x0013   100   100   097    Pre-fail  Always       -       0
 12 Power_Cycle_Count       0x0032   100   100   020    Old_age   Always       -       4
 18 Head_Health             0x000b   100   100   050    Pre-fail  Always       -       0
187 Reported_Uncorrect      0x0032   100   100   000    Old_age   Always       -       0
188 Command_Timeout         0x0032   100   100   000    Old_age   Always       -       0
190 Airflow_Temperature_Cel 0x0022   071   050   040    Old_age   Always       -       29 (Min/Max 25/36)
192 Power-Off_Retract_Count 0x0032   100   100   000    Old_age   Always       -       1
193 Load_Cycle_Count        0x0032   100   100   000    Old_age   Always       -       21
194 Temperature_Celsius     0x0022   029   040   000    Old_age   Always       -       29 (0 22 0 0 0)
197 Current_Pending_Sector  0x0012   100   100   000    Old_age   Always       -       0
198 Offline_Uncorrectable   0x0010   100   100   000    Old_age   Offline      -       0
199 UDMA_CRC_Error_Count    0x003e   200   200   000    Old_age   Always       -       0
200 Pressure_Limit          0x0023   100   100   001    Pre-fail  Always       -       0
240 Head_Flying_Hours       0x0000   100   253   000    Old_age   Offline      -       65h+45m+02.089s
241 Total_LBAs_Written      0x0000   100   253   000    Old_age   Offline      -       35912985792
242 Total_LBAs_Read         0x0000   100   253   000    Old_age   Offline      -       27344671168

There are several attributes that you should pay close attention to in here: The Power_On_Hours, Head_Flying_Hours, Total_LBAs_Written, and Total_LBAs_Read attributes should all be close to zero on a new drive, as these attributes should all have been zero when you unpacked the drive and should only reflect any activity that has happened since you installed the drive.

If these attributes show anything else, it probably indicates that you’ve been sold a refurbished drive, and you should consider returning it. This is especially true if these numbers are high.

Check SMART Selftest Logs

I also check the logs of any self tests that have been run against the drive by SMART using the “smartctl -l selftest” command:

[user@server ~]$ sudo smartctl -l selftest /dev/sdc
smartctl 7.3 2022-02-28 r5338 [x86_64-linux-6.0.15-300.fc37.x86_64] (local build)
Copyright (C) 2002-22, Bruce Allen, Christian Franke, www.smartmontools.org

=== START OF READ SMART DATA SECTION ===
SMART Self-test log structure revision number 1
Num Test_Description    Status                  Remaining  LifeTime(hours)  LBA_of_first_error
# 1 Extended offline    Completed without error       00%        18         -
# 2 Short offline       Completed without error       00%         0         -

A new drive should have no self test records. If this command shows self tests on the device, something’s funky. (The tests that you see above are from after I ran my own tests on a new drive.)

This particular command came in really handy at one point when a shady vendor sold me some refurbished drives as new. The SMART attributes showed expected near zeroes for the Power_On_Hours and Head_Flying_Hours attributes, but the SMART self test logs showed that a short offline test had been run — and failed — at a lifetime hours that indicated that the drive had been actively in use for more than two years. Clearly that was a failed drive where the vendor had somehow cleared out the SMART attributes but neglected to clear out the self test logs. Needless to say, I wasn’t surprised when the drive immediately started showing bad sectors and returned my entire order immediately.

Run SMART Self Tests

The smartctl command can also initiate drive self tests and return the results. I always run both a short and a long self test before I put the drive into active use. A short self test will typically complete in just 1-3 minutes, and just does some minimal functionality testing of the drive. A long self test will run for many hours; depending on the type and size of the drive, it could easily take 12-24 hours to run, as it exercises the entire drive. These commands are run with the “smartctl -t short” and “smartctl -t long” commands:

[user@server ~]$ sudo smartctl -t short /dev/sdc
smartctl 7.3 2022-02-28 r5338 [x86_64-linux-6.0.15-300.fc37.x86_64] (local build)
Copyright (C) 2002-22, Bruce Allen, Christian Franke, www.smartmontools.org

=== START OF OFFLINE IMMEDIATE AND SELF-TEST SECTION ===
Sending command: "Execute SMART Short self-test routine immediately in off-line mode".
Drive command "Execute SMART Short self-test routine immediately in off-line mode" successful.
Testing has begun.
Please wait 1 minutes for test to complete.
Test will complete after Sun Jan 1 04:13:52 2023 GMT
Use smartctl -X to abort test.

As you can see, smartctl will tell you approximately how long the test will take to complete, and will tell you when you can expect to check back to see the results. You can use the “smartctl -l selftest” command as shown above to see the results of the test. If the test has not yet completed, that command will tell you how much of the test is remaining to be run.

Run full drive write and read tests

The final set of tests that I do is to write data to the entire drive, and then read data from the entire drive, to ensure that there are no obvious issues with any section of the drive. Depending on your drive speed and size, this can again be a very lengthy process (e.g., for the Exos 14 TB drive that prompted this post, it took about 18 hours to do each).

The “dd” command on Unix/Linux systems is used to convert and copy files, but since “cc” was already used for the C compiler, the authors named it “dd” instead (although some people will tell you that “dd” stands for “data destruction” or “data duplicator” instead).

Write to the entire drive

I use the following dd command to write data to the entire drive:

[user@server ~]$ sudo dd if=/dev/zero of=/dev/sdc bs=1M &
[1] 1562764

The if= option specifies that the input file is /dev/zero. This is a special device on Unix/Linux systems that will just repeatedly spit out null characters (ASCII character zero). The of= option specifies that the output file is the disk that I’m testing. Make sure to get the right disk, as dd will happily overwrite all data on the disk with no verification and no way to undo what you’re doing! The bs= option specifies that I’ll be using a block size of 1 mebibyte (1,048,576 bytes). So basically, this will just sequentially write 1MiB blocks of null characters to the disk until all the space on the disk has been written to.

The ampersand at the end of the command tells the OS to run it in the background, and the “[1] 1562764” response that you see above indicates that this is job 1, with PID (process ID) 1562764. Your own job number and PID may vary.

If you want to monitor the progress of the command, you can do so by sending a USR1 signal to the command using the “kill” command. E.g.:

[user@server ~]$ kill -USR1 %1
[user@server ~]$ 43066+0 records in
43066+0 records out
45157974016 bytes (45 GB, 42 GiB) copied, 301.514 s, 150 MB/s

In the example above, I’m sending a USR1 signal to job one (designated as %1). I could have provided the PID instead, but the job number is usually easier to remember. You’ll also note that the formatting looks a little weird, because you will usually get your next prompt before the process receives the USR1 signal and spits out the current status information.

This command will eventually complete with an error indicating that there’s no space left on the device, and providing statistics for the entire run. It’ll look something like this (although you may note that to capture the info below I used a different device):

dd: error writing '/dev/sdi2': No space left on device
2049+0 records in
2048+0 records out
2147483648 bytes (2.1 GB, 2.0 GiB) copied, 4.52105 s, 475 MB/s

Read from the entire drive

Once the full disk write is done, I perform a full disk read. This is also done using the dd command, as follows:

[user@server ~]$ sudo dd if=/dev/sdc of=/dev/null bs=1M &
[1] 1562764

In this case, the input file (if) is the disk you’re reading from, and the output file (of) is /dev/null, which is a special device that just discards anything that’s written to it. Once again, you can use “kill -USR1” to get interim progress statistics, and at the end it will spit out a message with final completion info (this time without an error message).

A final check with smartctl

Once I’ve finished the tests above, I run one final “smartctl -H” and one final “smartctl -A” and make sure that everything looks good. In particular, I’m looking for that “PASSED” and verifying that nothing looks wonky with any of the attributes (e.g., bad sector counts, etc.).

Start using the drive

Once a drive finishes all of the tests above, it’s ready to go. This isn’t a fast process, so it requires a fair bit of patience to get through it rather than just using the drive immediately. It only takes one experience losing a bunch of data that you’ve just put onto a new drive, though, before you see the value of this process.

Do you have a similar process that you follow? Any useful additional checks you like to run? Let me know!


Microsoft reads your files!

How’s that for a click-baity title?

In all seriousness, though, when you upload files to OneDrive, Microsoft scans their contents. When you think about it, this makes sense: At a minimum, Microsoft is doing some virus scanning, indexing, etc., which requires it to look at the contents of your files. I don’t think there’s anything malicious going on, but folks should be aware that it’s happening.

You might ask what exactly brought this revelation to mind? What caused me to suddenly think about this?

Well… After years of stubbornly sticking with local accounts only and refusing let Microsoft keep a copy of my Windows profile, documents, etc. in the cloud, I recently gave in and purchased a Microsoft 365 family subscription, and let Microsoft back up my Windows profile to OneDrive.

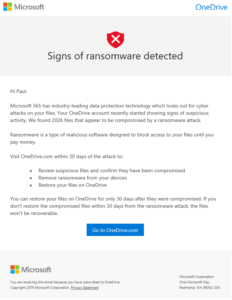
E-mail: Signs of Ransomware DetectedShortly thereafter, I received an ominous e-mail from Microsoft. It started with a big red “X” and giant text reading “Signs of ransomware detected” and then went on to tell me that Microsoft had “found 2026 files that appear to be compromised by a ransomware attack.”

My immediate thought was that it must be a phishing attack of some sort that happened to be coincidentally well timed. Nope. All the links were to valid Microsoft URLs and they took me straight to Microsoft’s site without detouring to a login page where my credentials could be harvested.

So what on earth could have caused Microsoft to suddenly believe that I was the victim of a ransomware attack?

The e-mail was less than helpful, as it didn’t tell me what files it thought were victim to this ransomware attack, so I was left to figure out for myself what files it was flagging. Clearly, Microsoft was scanning my files, and had found a bunch of encrypted files, but what could those files be?

Suddenly a lightbulb went off in my head. You see, I use Cryptomator, which is a tool that allows you to maintain an encrypted vault of files. You mount the vault on a drive letter which then lets you transparently access unencrypted versions of the files for editing, etc., but all of the actual file storage remains encrypted. The encryption is all done locally on your system with a key that you provide, so the privacy of your data is never in the hands of anybody else.

In my case, I use this vault to store sensitive stuff like tax returns, bank account statements, scans of the family passports, etc.

The key thing, though, is that I had just synced a copy of my vault to OneDrive. Microsoft’s internal systems tried to open those files, found that they couldn’t, and went “Oh no! You must be the victim of a ransomware attack!” Nope. Sorry, Microsoft. Those are perfectly legitimate files that I deliberately encrypted because I don’t want you or anybody else to read them.

So what did I learn here?

  1. Microsoft opens your files and looks at what’s inside them.
  2. Microsoft can’t differentiate between files that you’ve deliberately encrypted and files that have been encrypted by ransomware (which is understandable, I suppose).
  3. When Microsoft finds files that it thinks are impacted by ransomware, it’ll tell you so, but won’t tell you which files it thinks are a problem.

Sys Army Knife – What’s in list x but not list y?

Sys Army KnifeIt’s time once again to pull out your sys army knife and explore how to best use some of the tools available to system administrators out there! These “sys army knife” posts explore how to use common Linux/Unix command line tools to accomplish tasks that system administrators may encounter day-to-day.
I’m regularly involved in large-scale data center migration projects, so I quite commonly have to look at two different lists of things and figure out which entries are unique to each list.

For instance, I might have a list of machines that we’re planning to migrate. If someone gives me an updated list of machines in the data center. I have to figure out if there are machines we don’t have to migrate after all, or if there are new machines we have to plan for.

Sysadmins do it with one line

If each of your lists contains only unique values, this task can be done with a simple one liner, like this:

cat file1 file2 file2 | sort | uniq -u

For example, let’s say that I have two lists. The first list is in a file named x and looks like this:

appserver01
appserver02
dbserver01
webserver01
webserver02
webserver03

The second list is in a file named y and looks like this:

appserver02
appserver03
dbserver01
webserver01
webserver03
webserver04

This shows the values unique to x:

$ cat x y y | sort | uniq -u
appserver01
webserver02

… and this shows the lines unique to y:

$ cat y x x | sort | uniq -u
appserver03
webserver04

How does it work?!?

What the commands above do is this: They take one copy of one file, two copies of a second file, sort the results, and then only print out lines that occur a single time.

You start with one copy of the first file, which means you have one copy of every line in that file. Then you add two copies of the second file. This means that you will have three copies of any line that is in both files, and two copies of any line that only occurs in the second file, but you’ll still only have one copy of any line that only exists in the first file. Thus, if you search for lines that only occur once in the final results, you’ll only find lines that are unique to the second file.

Here’s a little more detail:

The first part of the command (cat file1 file2 file2) concatenates together one copy of file1 and two copies of file2 and spits that out.

We then take the output of that cat command and pipe (‘|’) it to the sort command, which will produce a sorted copy of the data it receives. We need to do this because the next command we use expects its input to be sorted, and won’t produce correct results if the input it receives isn’t sorted.

Finally, we pipe the sort output to the ‘uniq’ command. The ‘-u’ option to the uniq command tells it to only print unique lines (i.e., lines that only exist once).

There can be only one…

You may encounter situations where the contents of your lists have duplicate values. If you have no duplicate values in file1, but duplicate values in file2, the command chain will still work as expected. However, if you have duplicate values in file1, all of those values will be ignored even if they only exist in file1. This is because the ‘uniq -u’ command looks for lines in the file that only exist once in either file.

The quick and easy way around this is to simply create a copy of file1 that removes any duplicates before starting:

sort -u file1 > file1.nodupes

Then use that file without the duplicates in the command chain:

cat file1.nodupes file2 file2 | sort | uniq -u

The beauty of it all

This may seem like an esoteric problem that you’re not likely to encounter very often, but you might be surprised how often this problem comes up. Here are just a few examples off the top of my head:

  • Find files that are unique between two servers
  • Find installed packages that are unique between two servers
  • Using old and new server lists figure out which servers are gone and which are new

These commands are all very simple standard commands that exist on pretty much any Unix or Linux system out there: I started using these commands way back in the late 80’s on a MicroVax II running ULTRIX and have since used them on multiple versions of AIX, BSD, HP-UX, IRIX, Linux, and SunOS/Solaris.

Systemd Sucks… Up Your Disk Space

Over the last several years, the advent of systemd has been somewhat controversial in the Linux world. While it undeniably has a lot of features that Linux has been lacking for some time, many people think that it has gone too far: They think it insinuates itself into places it shouldn’t, unnecessarily replaces functionality that didn’t need to be replaced, introduces bloat and performance issues, and more.

I can see both sides of the argument and I’m personally somewhat ambivalent about the whole thing. What I can tell you, though, is that the default configuration in Fedora has a tendency to suck up a lot of disk space.

Huge… tracts of land

The /var/log/journal directory is where systemd’s journal daemon stores log files. On my Fedora systems, I’ve found that this directory has a tendency to grow quite large over time. If left to its own devices, it will often end up using many gigabytes of storage.

Now that may not sound like the end of the world. After all, what are a few gigabytes of log files on a modern system that has multiple terabytes of storage?

Like the whole systemd argument, you can take two different perspectives on this:

Perspective 1: Disk is cheap, and if I’m not using that disk space for anything else, why not go ahead and fill it up with journal daemon logs?

Perspective 2: Why would I want to keep lots of journal daemon logs on my system that I probably won’t ever use?

I tend to take the second perspective. In my case, this is compounded by several other factors:

  1. I keep my /var/log directory in my root filesystem and deliberately keep that small (20GB), so I really don’t want it to fill up with unnecessary log files.
  2. I back up my entire root filesystem nightly to local storage and replicate that to remote storage. Backing up these log files takes unnecessary time, bandwidth, and storage space.
  3. I have a dozen or so KVM virtual machines and LXC containers on my main server. If I let the journal daemon logs on all of these run amok that space really starts to add up.

Quick and Dirty Cleanup

If you’re just looking to do some quick disk space reclamation on your system, you can do this with the the ‘journalctl’ command:

journalctl --vacuum-size=[size]

Quick note: Everything in this post requires root privileges. For simplicity, I show all the commands being run from a root shell. If you’re not running in a root shell, you’ll need to preface each command with ‘sudo’ or an equivalent to run the command with root privileges.

When using the journalctl command above, you specify what size you want the systemd journal log files to take up, and it will try to reduce the journal log files to that size.

Note that I say try. This command can’t do anything to log files that are currently open on the system, and various other factors may reduce its ability to actually reduce the total amount of space used.

Here’s an example I ran within an LXC container:

[root@server ~]# du -sh /var/log/journal
168M /var/log/journal
[root@server ~]# journalctl --vacuum-size=10M
Deleted archived journal /var/log/journal/ac9ff276839a4b429790191f8abb21c1/system@f24253741e8c412a9fe94a48257c2b35-0000000000000001-00055dcc288c8a73.journal (16.0M).
Deleted archived journal /var/log/journal/ac9ff276839a4b429790191f8abb21c1/user-2000@b54e732b7ea1430c95020d6a6553dccb-0000000000000f7b-00055dcef80287ee.journal (8.0M).
Deleted archived journal /var/log/journal/ac9ff276839a4b429790191f8abb21c1/system@f24253741e8c412a9fe94a48257c2b35-0000000000002c74-00056030edf54f82.journal (8.0M).
Deleted archived journal /var/log/journal/ac9ff276839a4b429790191f8abb21c1/user-2000@b54e732b7ea1430c95020d6a6553dccb-0000000000002d0e-00056056271d449c.journal (8.0M).
Deleted archived journal /var/log/journal/ac9ff276839a4b429790191f8abb21c1/system@f24253741e8c412a9fe94a48257c2b35-0000000000003d92-00056295d1dfc0cb.journal (8.0M).
Deleted archived journal /var/log/journal/ac9ff276839a4b429790191f8abb21c1/user-2000@b54e732b7ea1430c95020d6a6553dccb-0000000000003e4d-000562bca405ac7c.journal (8.0M).
Deleted archived journal /var/log/journal/ac9ff276839a4b429790191f8abb21c1/system@000562f8e6bc4730-4bc5e6409eab3024.journal~ (8.0M).
Deleted archived journal /var/log/journal/ac9ff276839a4b429790191f8abb21c1/system@866bd5425da84c0387e801f0d9f0dbe0-0000000000000001-0005630ace84e3a6.journal (8.0M).
Deleted archived journal /var/log/journal/ac9ff276839a4b429790191f8abb21c1/system@0005630ace895afa-db4ba70439580a20.journal~ (8.0M).
Deleted archived journal /var/log/journal/ac9ff276839a4b429790191f8abb21c1/user-2000@b54e732b7ea1430c95020d6a6553dccb-0000000000004f97-00056526bc67d197.journal (8.0M).
Deleted archived journal /var/log/journal/ac9ff276839a4b429790191f8abb21c1/system@000567364f741221-fef3cfcfe59c68bc.journal~ (8.0M).
Deleted archived journal /var/log/journal/ac9ff276839a4b429790191f8abb21c1/system@00056779411bc792-2224320b49ef5929.journal~ (8.0M).
Deleted archived journal /var/log/journal/ac9ff276839a4b429790191f8abb21c1/system@7e3dc17225834c50ab9cbec8c0551dc4-0000000000000001-000567794116176d.journal (8.0M).
Deleted archived journal /var/log/journal/ac9ff276839a4b429790191f8abb21c1/user-2000@b54e732b7ea1430c95020d6a6553dccb-0000000000006c42-000567adbbc43bff.journal (8.0M).
Deleted archived journal /var/log/journal/ac9ff276839a4b429790191f8abb21c1/system@000567ef1af7e427-3c61c0089c605c91.journal~ (8.0M).
Deleted archived journal /var/log/journal/ac9ff276839a4b429790191f8abb21c1/system@ae06f5eac535470a823d126d23143e57-0000000000000001-000569a28b47d93a.journal (8.0M).
Vacuuming done, freed 136.0M of archived journals from /var/log/journal/ac9ff276839a4b429790191f8abb21c1.
[root@server ~]# du -sh /var/log/journal
32M /var/log/journal

As you can see, while this did reduce the logs significantly (from 168M to 32M), it was unable to reduce them down to the 10M that I requested.

It’s also really important to remember that cleaning up log files with journalctl is not a permanent solution. Once you clean them up they’ll just start growing again.

The Permanent Fix

The way to permanently fix the problem is to update the journal daemon configuration to specify a maximum retention size. The configuration file to edit is /etc/systemd/journald.conf. On a Fedora system the default configuration file looks something like this:

# This file is part of systemd.
#
# systemd is free software; you can redistribute it and/or modify it
# under the terms of the GNU Lesser General Public License as published by
# the Free Software Foundation; either version 2.1 of the License, or
# (at your option) any later version.
#
# Entries in this file show the compile time defaults.
# You can change settings by editing this file.
# Defaults can be restored by simply deleting this file.
#
# See journald.conf(5) for details.

[Journal]
#Storage=auto
#Compress=yes
#Seal=yes
#SplitMode=uid
#SyncIntervalSec=5m
#RateLimitIntervalSec=30s
#RateLimitBurst=1000
#SystemMaxUse=
#SystemKeepFree=
#SystemMaxFileSize=
#SystemMaxFiles=100
#RuntimeMaxUse=
#RuntimeKeepFree=
#RuntimeMaxFileSize=
#RuntimeMaxFiles=100
#MaxRetentionSec=
#MaxFileSec=1month
#ForwardToSyslog=no
#ForwardToKMsg=no
#ForwardToConsole=no
#ForwardToWall=yes
#TTYPath=/dev/console
#MaxLevelStore=debug
#MaxLevelSyslog=debug
#MaxLevelKMsg=notice
#MaxLevelConsole=info
#MaxLevelWall=emerg

The key line is “#SystemMaxUse=”. To specify the maximum amount of space you want the journal daemon log files to use, uncomment that line by removing the hash mark (‘#’) at the start of the line and specify the amount of space after the equals (‘=’) at the end of the line. For example:

SystemMaxUse=10M

You can use standard unit designators like M for megabytes or G for gigabytes.

Once you’ve updated this configuration file, it will take effect the next time the journal deamon restarts (typically upon system reboot). To make it take effect immediately, simply tell systemd to restart the journal daemon using the following command:

systemctl restart systemd-journald

Note that if you’ve specified a very small size, like the example above, this still might not shrink the logs down to the size specified. For example:

[root@server ~]# systemctl restart systemd-journald
[root@server ~]# du -sh /var/log/journal
32M /var/log/journal

As  you can see, we still haven’t reduced the log files down below the maximum size we specified. To do so, you have to stop the journal daemon, completely remove the existing log files, and then restart the journal daemon:

[root@server ~]# systemctl stop systemd-journald
Warning: Stopping systemd-journald.service, but it can still be activated by:
systemd-journald.socket
systemd-journald-audit.socket
systemd-journald-dev-log.socket
[root@server ~]# rm -rf /var/log/journal/*
[root@server ~]# systemctl start systemd-journald
[root@server ~]# du -sh /var/log/journal
1.3M /var/log/journal

Ta-da! Utilization is now down to a minimal amount, and as the log grows the journal daemon should keep it to down to a size less than the maximum amount you’ve specified.

Pigs In Space

Today I noticed that my root filesystem has a little less free space than I would really like it to have, so I decided to do a bit of cleanup…

Finding The Space Hogs

I’m a bit old-fashioned, so I still tend to do this sort of thing from the command line rather than using fancy GUI tools. Over the years, this has served me well, because I can get things done even if I only have terminal access to a system (e.g., via ssh or a console) and only have access to simple standard commands on a system.

One quick trick is that you can easily find the top ten space hogs within any given directory using the following command:

du -k -s -x * | sort -n -r | head

Let me break down what this does.

The ‘du’ command provides you with information on disk usage. Its default behavior is to give you a recursive listing of how much space is used beneath all directories from the current directory on down.

The ‘-k’ option tells du to report all utilization numbers using kilobytes. This will be important in a moment when we sort the list, as most modern versions of du will default to using the most appropriate unit. it’s much easier for a generic sort program to automatically sort 1200 and 326 than it is to sort 1.2G and 326M.

The ‘-s’ option tells du to only report a sum for each file or directory specified, rather than also recursively reporting on all of the subdirectories underneath.

The ‘-x’ option tells du to stay within the same filesystem. This is important if you’re exploring a filesystem that might have other filesystems mounted beneath it, as it tells du not to include information from those other filesystems. For instance, if you’re trying to clean up /var and /var/lib/lxc is a different filesystem mounted from its own separate storage, you don’t want to include the stuff under /var/lib/lxc in your numbers.

Finally, we specify an asterisk wildcard (‘*’) to tell du to spit out stats for each file and directory within the current directory. (Note that if you have hidden files or directories — files that begin with a ‘.’ in the Linux/Unix world — the asterisk will ignore those by default in most shells.)

Next, we pipe the output of the du command to the ‘sort’ command, which does pretty much exactly what it sounds like it should do.

The ‘-n’ option tells sort to do a numeric sort rather than a string sort. By default sort will use a string sort, which would yield results like “1, 10, 11, 2, 3” instead of “1, 2, 3, 10, 11”.

The ‘-r’ option tells sort that we want it to output results in reverse order (i.e., last to first, or biggest to smallest).

Finally, we pipe the sorted output to the ‘head’ command. The head command will spit out the “head,” or the first few lines of a file. By default, head will spit out the first ten lines of a file.

The net result is that this command gives the top ten space hogs in the current directory.

On my system I know that it’s almost invariably the /var filesystem that sucks up space on my root filesystem, so I started there:

[root@server ~]# cd /var
[root@server var]# du -k -s -x * | sort -n -r | head
3193804 lib
2859856 spool
1386684 log
195932 cache
108 www
88 tmp
12 kerberos
12 db
8 empty
4 yp

This tells me that I need to check out /var/lib, /var/spool, and /var/log. The /var/cache directory might yield a little space if cleaned up, but probably not a lot, and everything else is pretty much beneath my notice.

From here, I basically just change directory to each of the top hitters and repeat the process, cleaning up unnecessary files as I go along.

Sys Army Knife – Finding IP Addresses

Time to pull out your sys army knife and explore how to best use some of the tools available to system administrators out there!

Every system administrator knows that you should always use DNS names (e.g., myserver.mydomain.com) instead of IP addresses (e.g., 192.168.1.4). You should avoid ever using IP addresses in configuration files, URLs, or (heaven forbid!) hard coded into scripts or compiled programs. But every system administrator also knows that there are situations where you simply have to use an IP address (e.g., /etc/resolv.conf). And of course, some people just like to be ornery and use IP addresses even when a DNS name would work perfectly well.

Sooner or later, every system administrator encounters a situation where he needs to change the IP address of a system, or a few systems, or a few thousand systems.

So you’re changing the IP address of a system. You know that there might be things out there that contain that IP address — on the system itself, or perhaps on other systems. You don’t want to break said things. You need a quick and easy way to figure out what things use the current IP address of the system, so that you can change them when you change the IP address. What do you do?

The “grep” command is your friend.

One tool that every system administrator should be familiar with is “grep” and its accompanying versions “egrep” and “fgrep”. “Grep” is short for “get regular expression.” Basically a “regular expression” is a set of criteria for matching text. The “egrep” command is an “extended” grep, offering more text searching functionality and “fgrep” is a “fast” grep, which works more quickly but offers less functionality.

At its simplest, you can use grep to search for an IP address in file like this:

grep 'IP_address' file

For instance:

$ grep '192.168.1.4' /etc/hosts
192.168.1.4     myserver myserver.mydomain.com

As you can see in the example above, we used grep to search for 192.168.12.4 in the /etc/hosts file and it found a line that defined 192.168.12.4 as the IP address for a server named myserver or myserver.mydomain.com.

Limiting your scope – periods are not what they appear.

The example above is not a particularly good one, though, because in grep a period is a “wild card” character. When you include a period in your regular expression, it doesn’t mean “look for a period.” It means “look for any character.”

So given the example above, you could just as easily end up with results that look like this:

$ grep '192.168.1.4' /etc/hosts
192.168.1.4     myserver myserver.mydomain.com
192.168.144.12  otherserver otherserver.mydomain.com

It’s obvious why the “myserver” line shows up, but if you’re not familiar with regular expressions you may wonder why on earth that second line showed up. The answer is simple: That period in your regular expression matches against any character. So it matches against the period in 192.168.1.4, but it also matches against the 4 in 192.168.144.12.

So how do you avoid this undesirable behavior? It’s simple: You just need to “escape” any periods in your regular expression by putting a backslash (\) in front of them. This tells grep that you don’t want the period to act as a wild card, but instead want to literally look for a period. Thus, your new search now looks like this:

$ grep '192\.168\.1\.4' /etc/hosts
192.168.1.4     myserver myserver.mydomain.com

Note that this time your search didn’t pick up the extra line.

Limiting your scope – word boundaries.

Unfortunately, we’re still not done refining our regular expression. Because a regular expression is matched against any part of the line, you still may end up getting results that you don’t want even after you’ve escaped your periods. For example:

$ grep '192\.168\.1\.4' /etc/hosts
192.168.1.4     myserver myserver.mydomain.com
192.168.1.40    workstation1 workstation1.mydomain.com
192.168.1.41    workstation2 workstation2.mydomain.com

Why do these extra lines show up? It’s simple, really: “192.168.1.4” matches the first part of “192.168.1.40” and “192.168.1.41,” so those lines both get picked up as well.

How do you avoid this? The best way is to use egrep (extended grep), which supports more powerful regular expressions. Egrep allows you to use “\b” to match against a word boundary.

Basically, the \b escape means “search for a word boundary here” (remember the mnemonic “\b is for boundary”). A word boundary is the beginning of a line, end of a line, any white space (tabs, spaces, etc.), or any punctuation mark. So if you put a \b in front of the IP address you’re looking for and another \b at the end of the IP address you’re looking for, you’ll eliminate the sort of partial match that happened above:

$ egrep '\b192\.168\.1\.4\b' /etc/hosts
192.168.1.4     myserver myserver.mydomain.com

Voila! Now those pesky extraneous entries no longer show up!

Searching Recursively

In all the examples above, I show grep/egrep searching for an IP address in just one file — /etc/hosts. Realistically, though, you’re far more likely to need to search all the files in an entire directory tree for the IP address. For instance, you might know that the IP address you’re changing could be in some configuration files somewhere in the /etc directory or one of its subdirectories. Or you might know that the IP address could be in the source code files associated with a particular application. Or you might even just know that the IP address could be used somewhere in some file on your machine — but it could be literally anywhere on the machine.

You can give the grep/egrep command a list of multiple files to check. For instance, you could search for your IP address in the /etc/hosts and /etc/resolv.conf file like this:

$ egrep '\b192\.168\.1\.4\b' /etc/hosts /etc/resolv.conf
/etc/hosts:192.168.1.4 myserver myserver.mydomain.com
/etc/resolv.conf:nameserver 192.168.1.4

You could even search all of the files in /etc like this:

$ egrep '\b192\.168\.1\.4\b' /etc/*
/etc/hosts:192.168.1.4 myserver myserver.mydomain.com
/etc/resolv.conf:nameserver 192.168.1.4

However, it’s important to note that that will only search for files in /etc. It won’t search for files in /etc/subdir, /etc/deeper/subdir, and so on.

The grep commands support a “-r” option to recursively search all the files in a given directory and all of its subdirectories. For example:

$ egrep -r '\b192\.168\.1\.1\b' /etc
/etc/hosts:192.168.1.1 myrouter myrouter.mydomain.com
/etc/ntp.conf:server 192.168.1.1
/etc/resolv.conf:nameserver 192.168.1.1
/etc/sysconfig/network:GATEWAY=192.168.1.1

One Caveat and Final Thoughts

There’s one important caveat to all of this: This post is about using GNU’s version of the grep tools, which are used by all Linux distros and are available for basically every other platform you can think of (I even use it on Windows). If you’re stuck on a system that only has old-school Unix grep commands installed, though, your mileage may vary. In particular, the -r option is not implemented on older Sys-V grep implementations.

And of course, this only shows how to search for a single IP address. When I get a chance, I’ll add another blog entry describing how to look for a list of IP addresses on a system, and how to search for anything that’s an IP address. I also intend to do a write-up on how you can do automatic search-and-replace of IP addresses using sed, another tool that should be part of every system administrator’s sys army knife.

Biting off more than one can chew…

The astute reader may realize that it’s been several weeks since my last post, and that my detailed review of the rewritten Anaconda installer in Fedora 18 has not been going anywhere particularly fast. The even more astute reader may realize that Fedora 19 was released today, making the completion of that review something of a moot point.

A couple things I’ve learned so far in my foray into blogging:

Good, detailed blog entries take time.

If you think that you can write a quick blog entry on a complicated subject, think again, especially if you’re a detail oriented person like I am.

I initially took about two pages of notes and twenty screen shots of my Fedora 18 install experience. I figured I could churn out a one or two part blog post based on that in a few hours. After spending something like eight to ten hours on the first three parts of the review I realized that it would probably take me at least another three parts and a roughly equal amount of time to complete the review. This kind of put a damper on my enthusiasm.

Real life has a tendency to interfere with blogging.

If you have kids, they tend to have a lot of activities lumped together at the end of the school year. Then summer means they’re home all the time, and if you work from home a lot that creates its own problems (“Dad! Can you help me with…”). And, of course, if you change jobs and suddenly find yourself on the road about half the time working 10-12+ hour days, blogging suddenly drops way down on the priority list.

I’ll be taking small bites.

Going forward, in the hopes of actually getting back on track with my original goal of posting something once a week, I’ll be taking small bites. Perhaps I’ll share a hint about a favorite Unix/Linux command line trick, or briefly talk about some new toy, like the Ouya that I just got.

Red Hat Linux 5.2

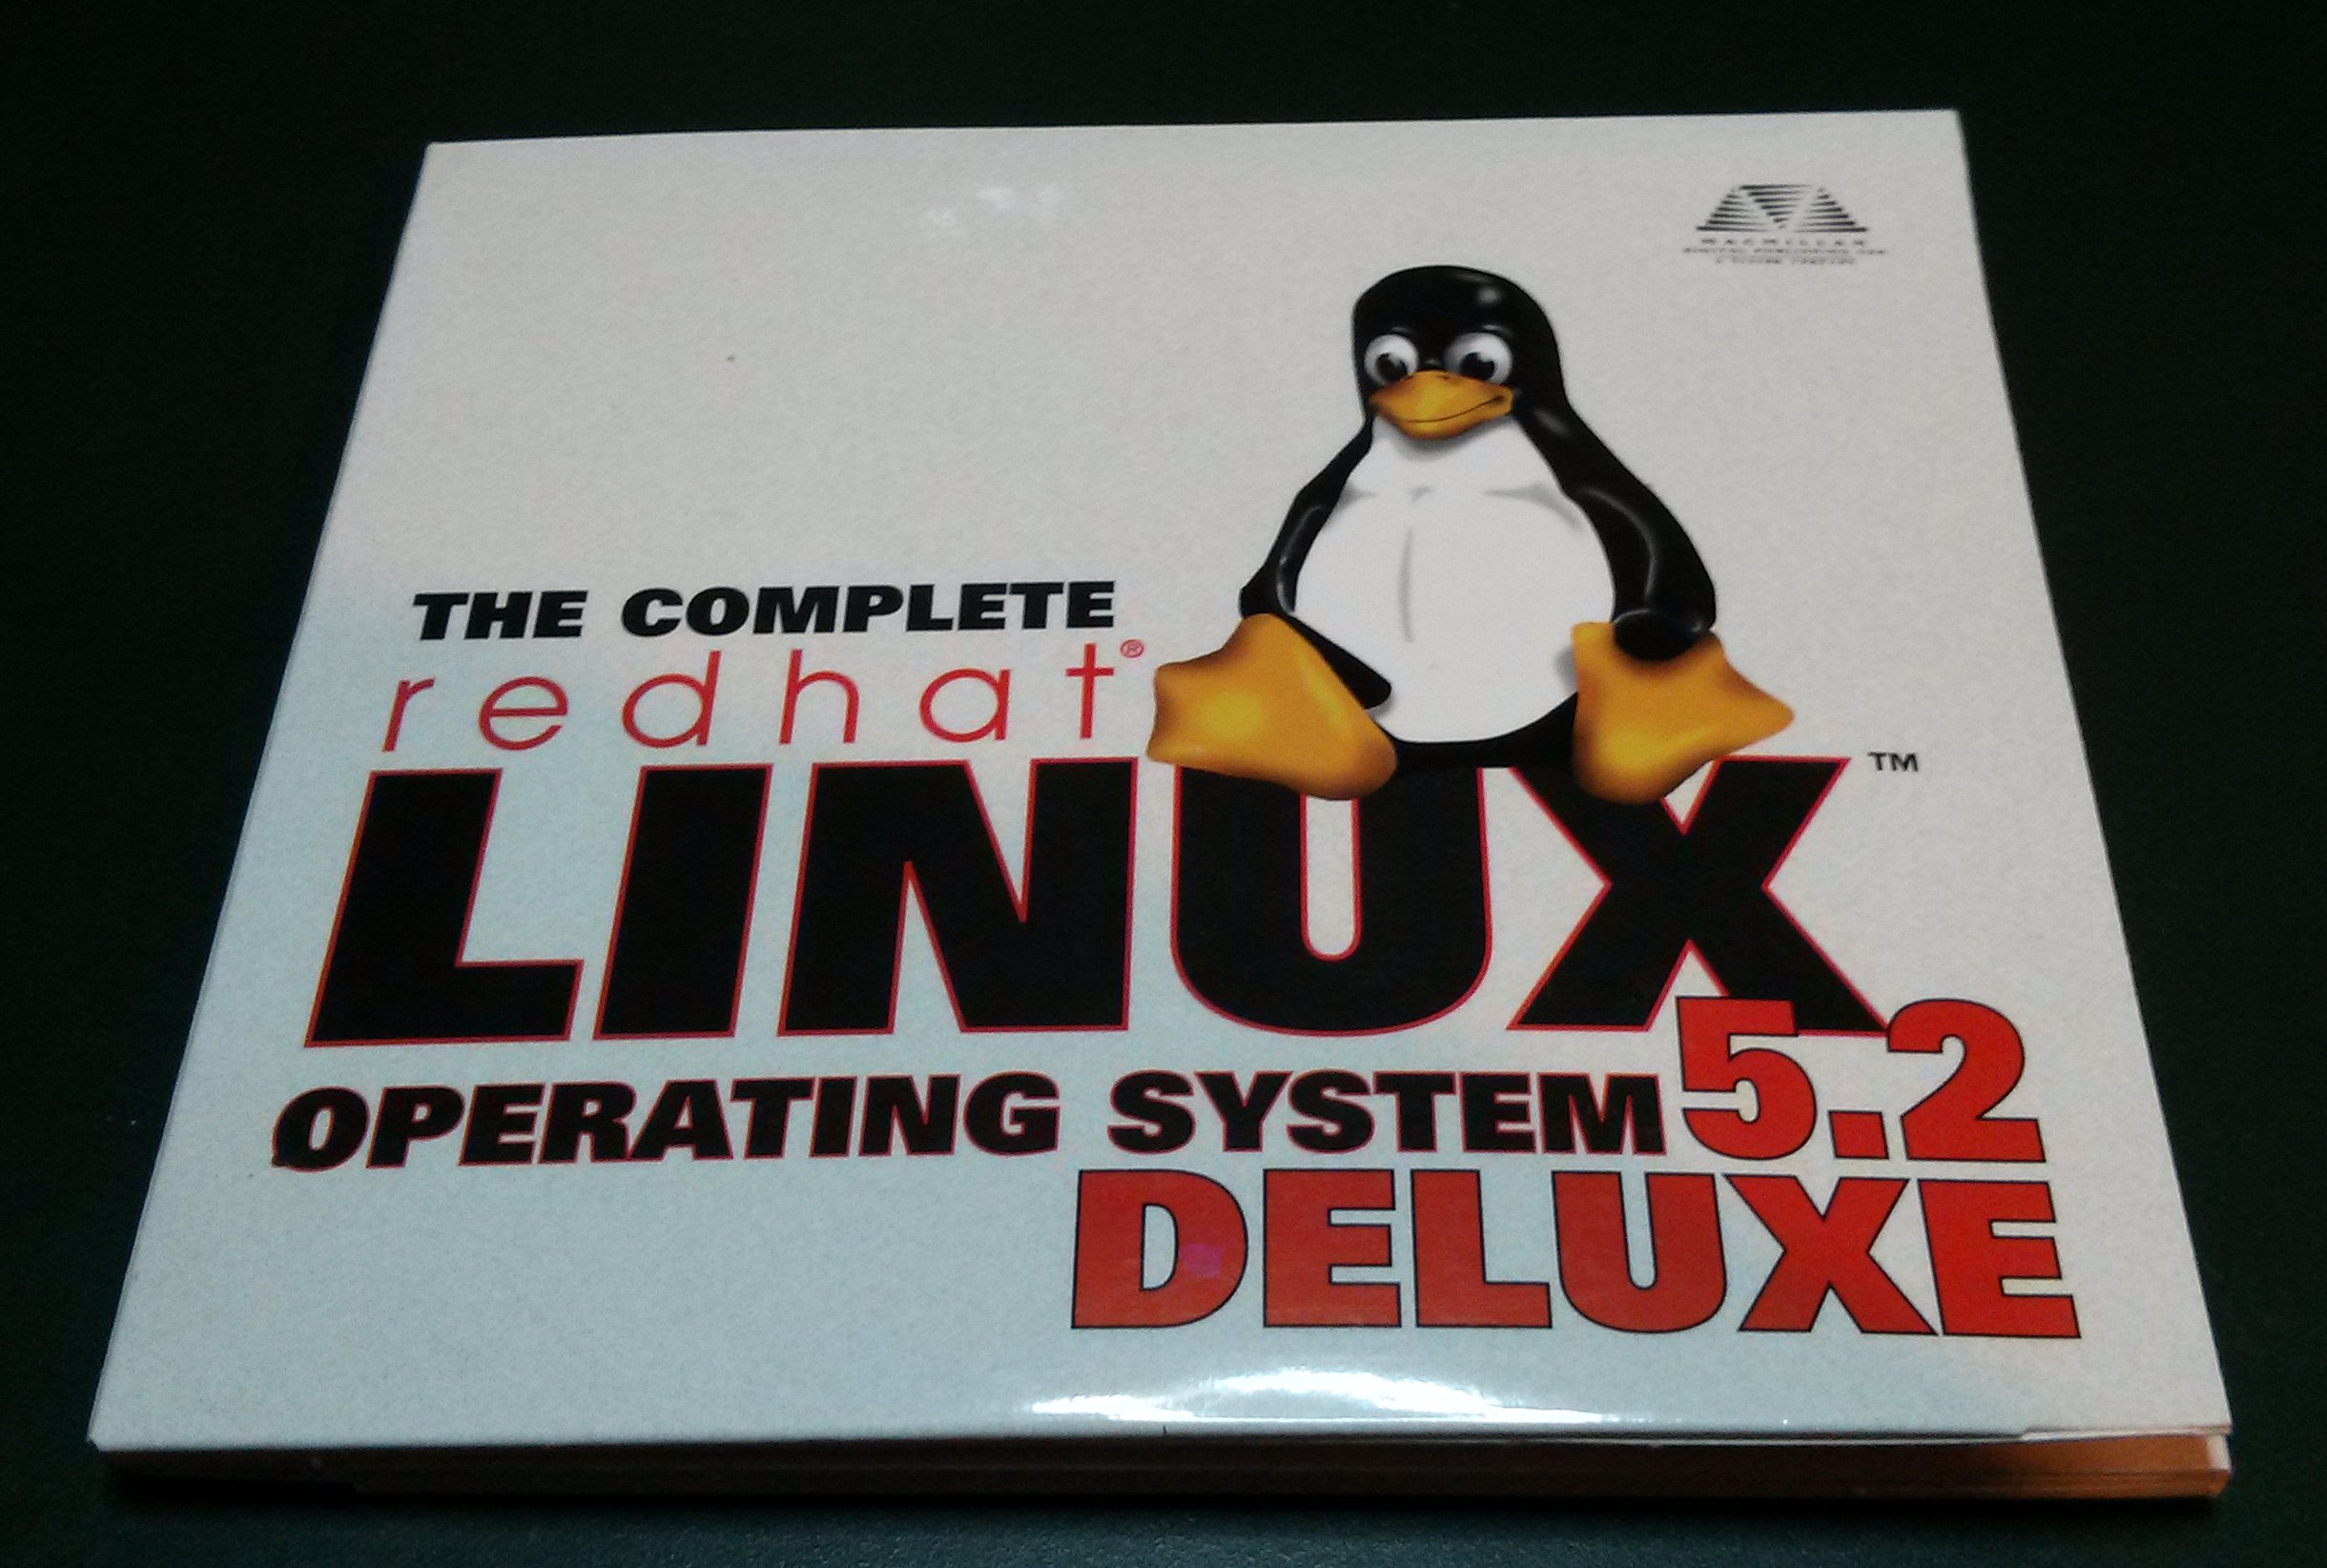
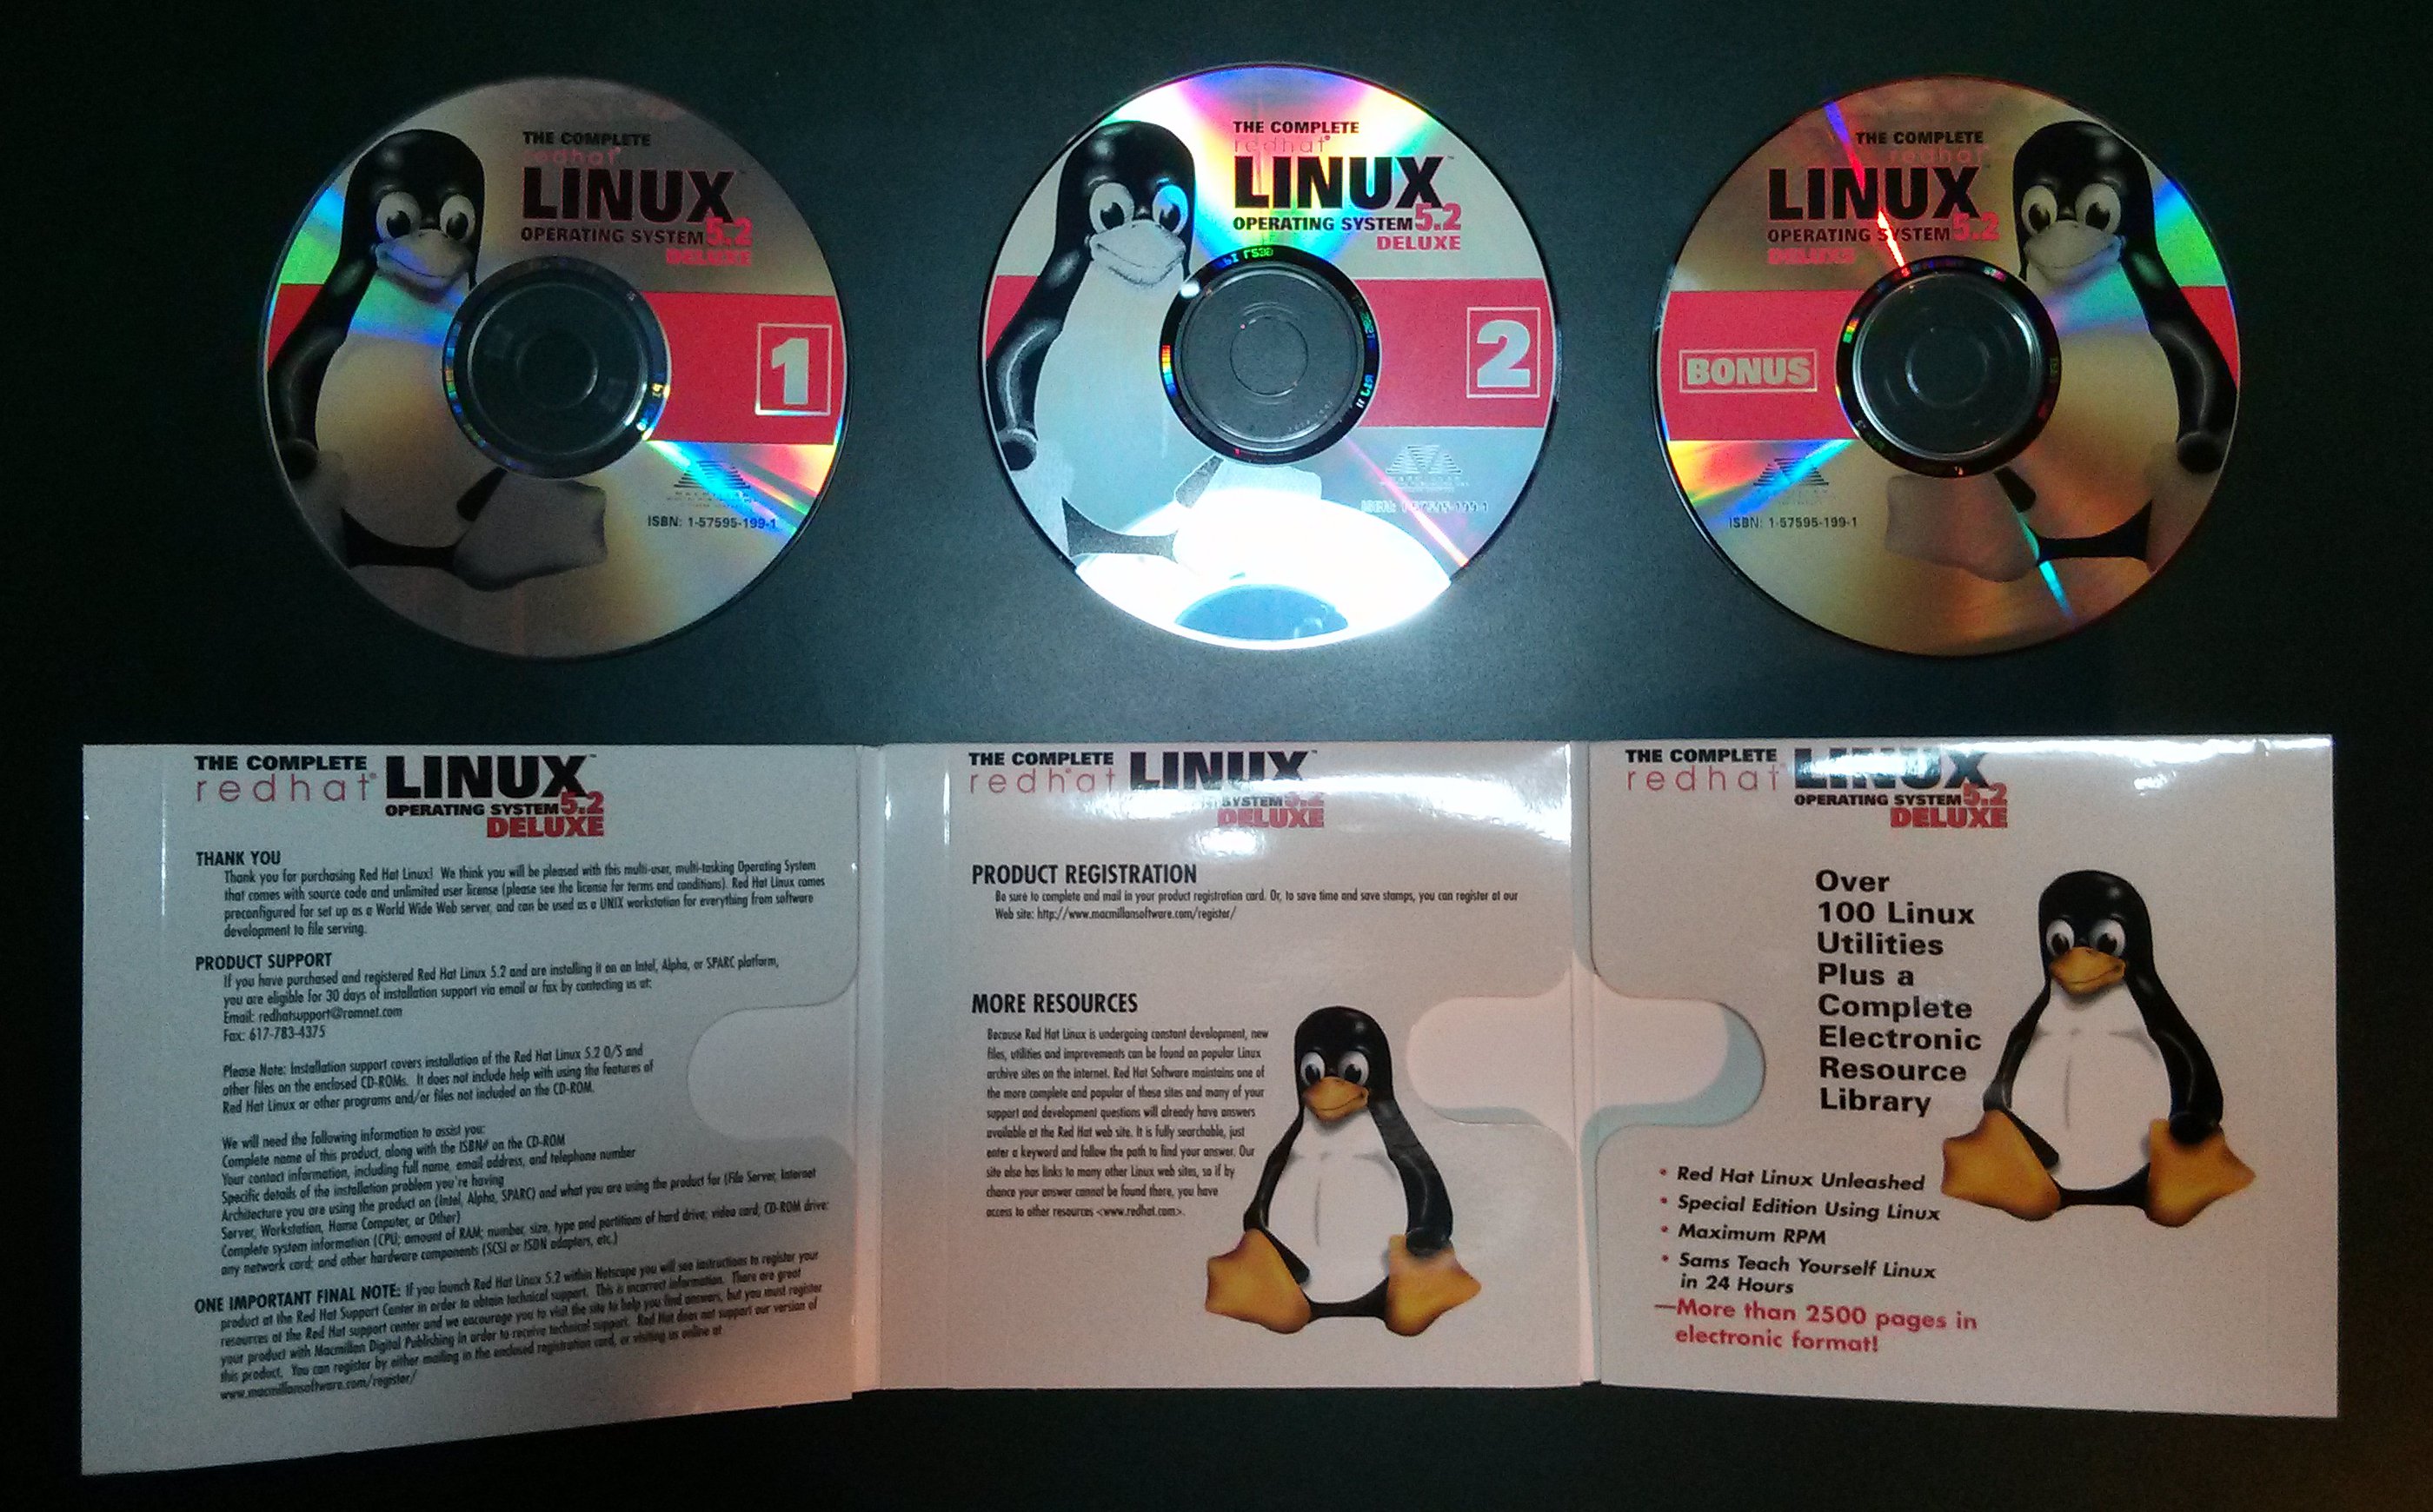
In a break from my Fedora 18 Installer review, I thought I’d share something that I found this week while cleaning my computer room. This was tucked away in a pile of old CD’s:

Red Hat Linux 5.2

Click to view full size.

Your immediate reaction may be “So what? Yeah, Red Hat Enterprise Linux is now up to version 6.4, and 5.x is up to 5.9, but 5.2 isn’t really that old.”

Take a closer look. That’s not Red Hat Enterprise Linux. That’s plain old Red Hat Linux, which was discontinued in 2003 and replaced with the Fedora Project. Red Hat Linux 5.2 was released in 1998, and has since been superseded by 27 releases of Red Hat Linux and Fedora.

If I recall correctly, I bought this particular CD set off the shelf at a Best Buy as a late Christmas present for myself in early 1999, and installed it on an old 100 Mhz Pentium (yes, megahertz, and yes, the original Pentium processor) system that I had lying around.

Inside the package

Click to view full size.

This particular package included the Red Hat 5.2 distribution on one CD (yes, the whole thing fit on a single CD), and a second CD containing source RPMs. It also included a third CD that had several e-books in Adobe Acrobat format (Maximum RPM, Red Hat Linux Unleashed, Special Edition: Using Linux, and Sam’s Teach Yourself Linux in 24 Hours).

Man! What a blast from the past!